P0A0A - High Voltage System Interlock Circuit 'A' in PCM module

Ford Focus Electric Forum

Help Support Ford Focus Electric Forum:

This site may earn a commission from merchant affiliate links, including eBay, Amazon, and others.

clarkpark

Member
Joined
Feb 18, 2024
Messages
5
Location
Redwood City, CA
Our 2016 FFE is dead with SSN error that will not clear. Here is what I get from ForScan:

Code: P0A0A - High Voltage System Interlock Circuit 'A'

Additional Fault Symptom :)01):
- General Electrical Failure

Status (-8F):
- DTC Present at Time of Request
- Malfunction Indicator Lamp is On for this DTC

Module: Powertrain Control Module

Freeze Frame #1:
-TOTAL_DISTANCE: 69466 km - Total Distance
-MODULE_VOLTAGE: 11.8 V - Control Module Voltage
-OUTDOOR_TEMPERATURE: 14 °C - Outside temperature

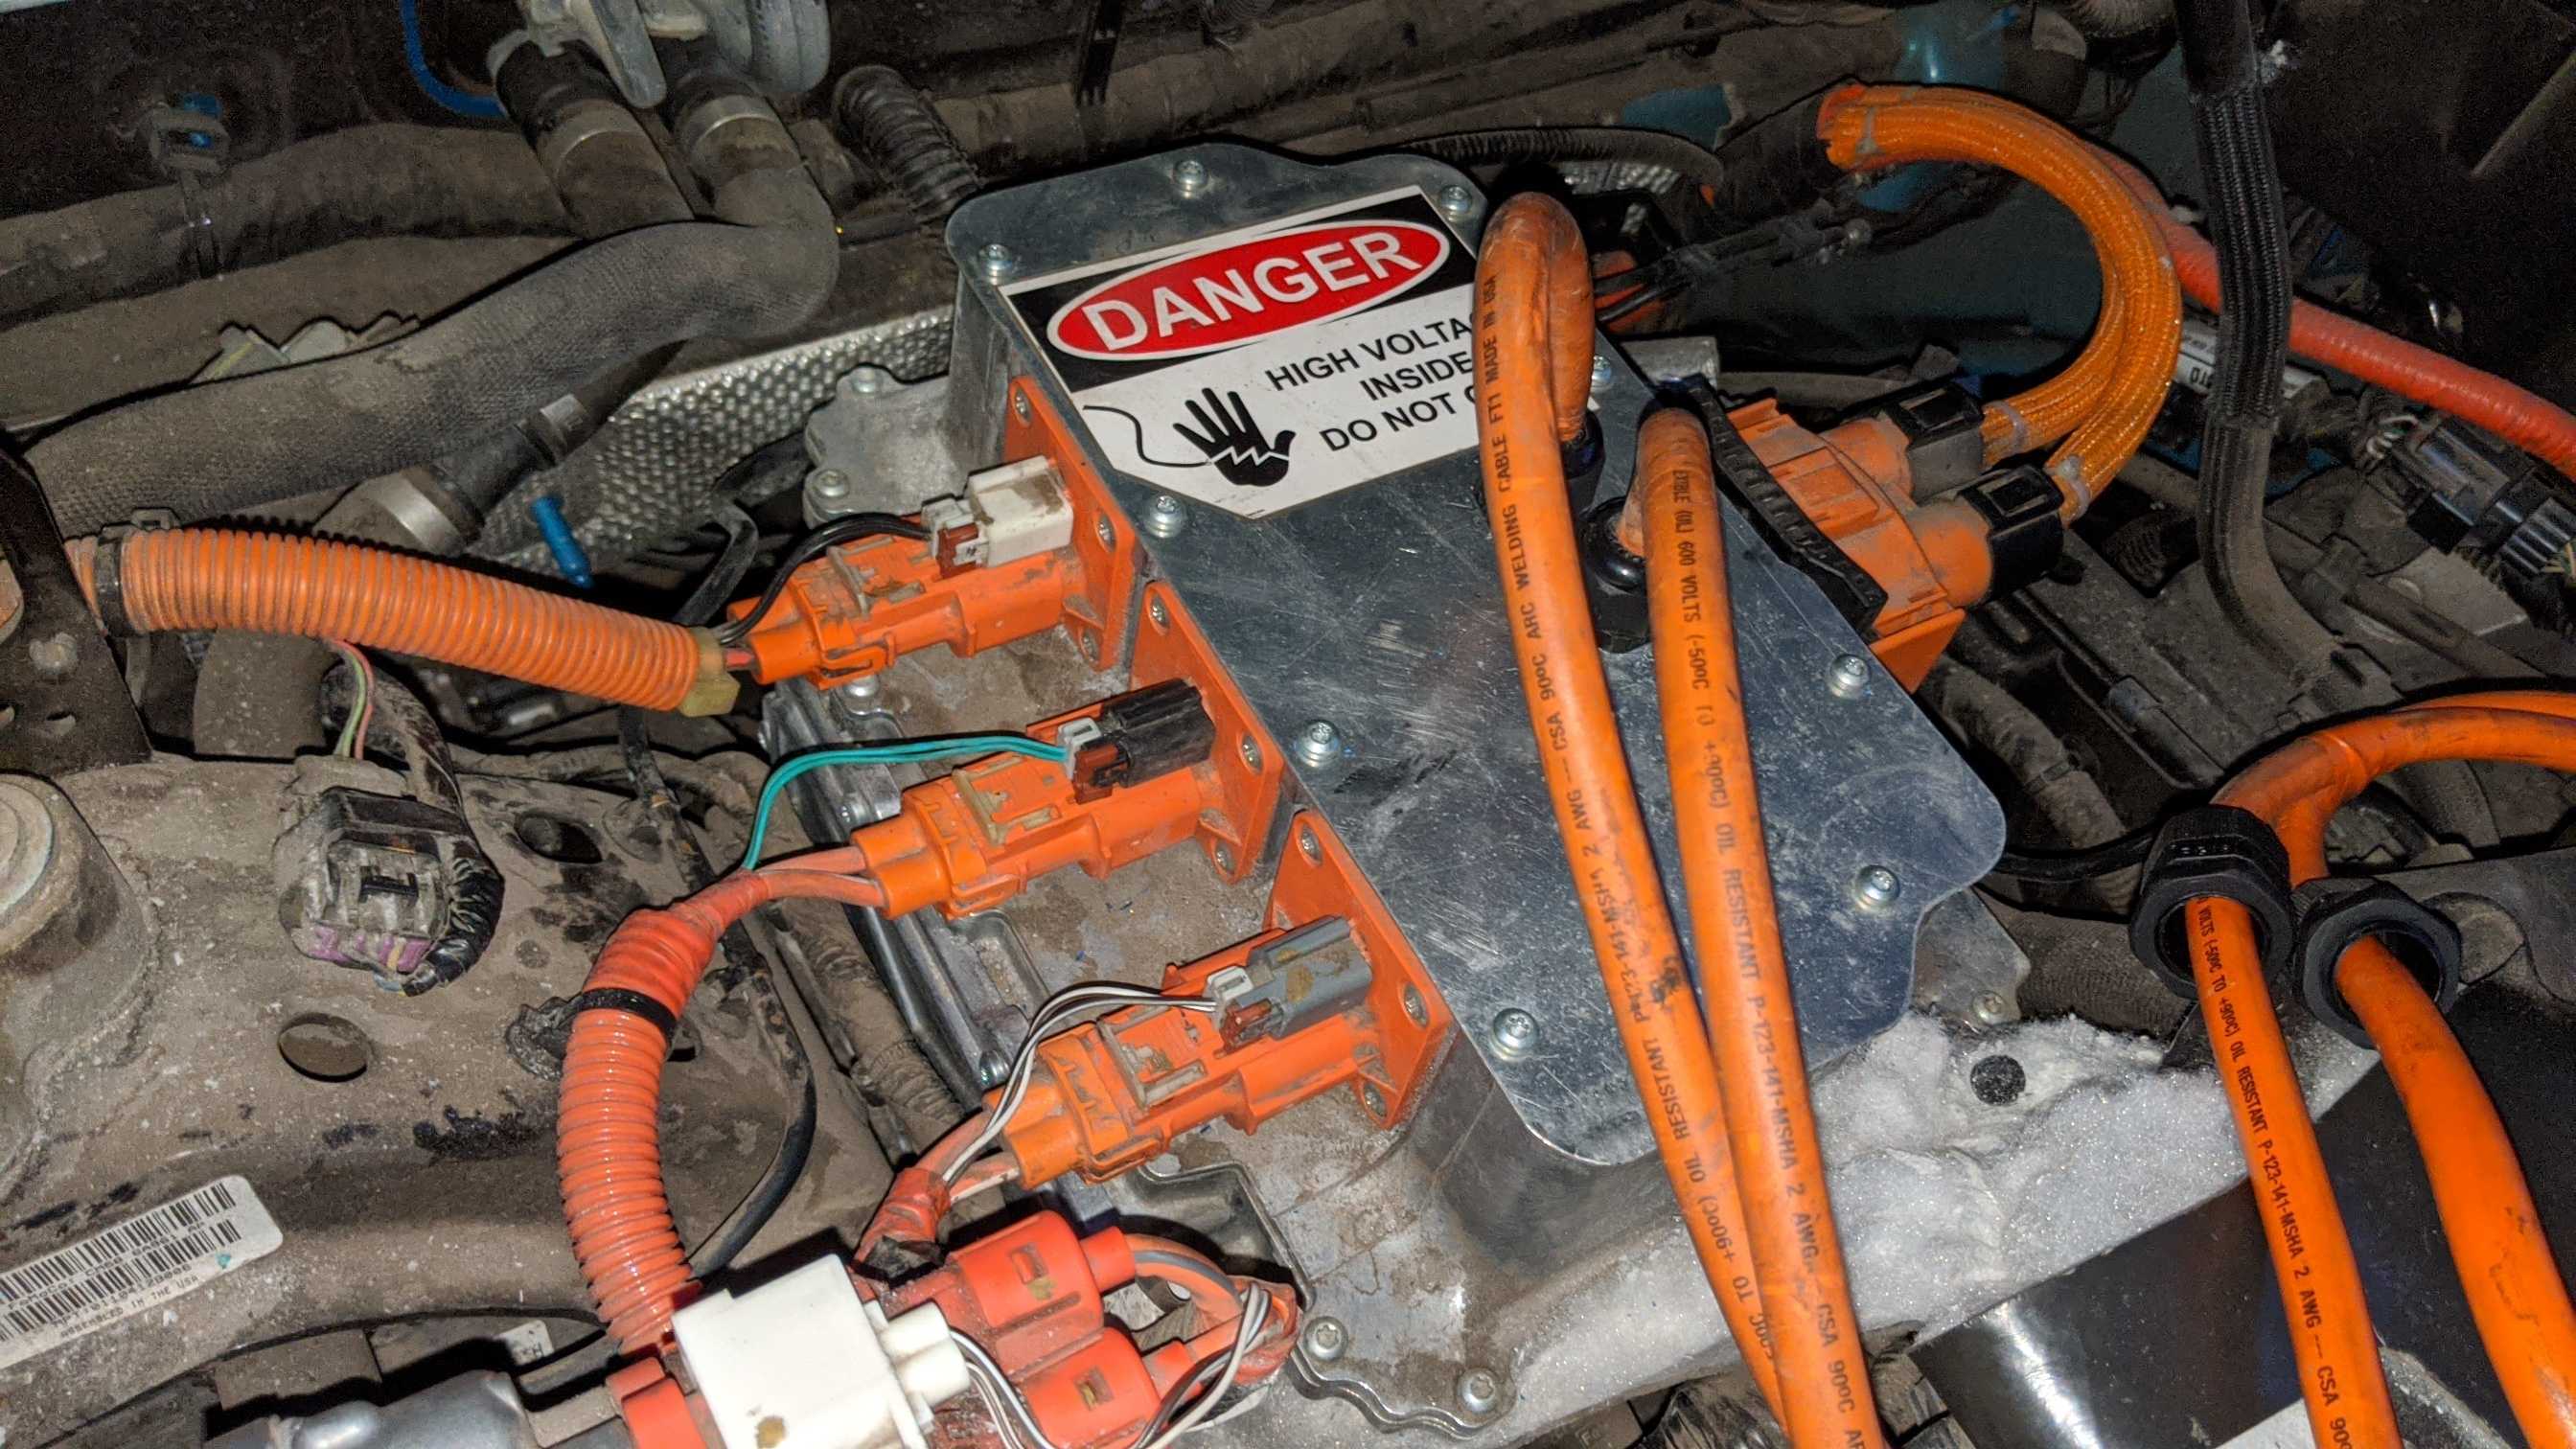
I understand that this could be a loose connector causing this problem. Are there instructions where to find these connections before I have it towed to the dealer?
The car first went on sale in Jan 2016 but didn't actually get sold until 2017. Not sure if Ford will honor the warranty or not.

Thanks in advance for any tips!
Clark
 
I'm looking the in the 2016 wiring manual - but it should be the same for any pre-2017.
  • The PCM has HV interlock voltage coming out of it on pin 55 of connector C175B.
  • That goes into the TCM on pin 14 of connector C1822A.
  • The HVIL path in the TCM is jumpered on
    • pins 1 & 2 of C1822C
    • pins 1 & 2 of C1822E
    • pins 3 & 4 of C1822B
  • It then goes out pin 2 of C1822G to pin 4 of C1457A on DCDC
  • It comes back out pin 3 of C1457A on DCDC and returns on pin 1 of C1822G
  • Then comes out of the TCM on pin 13 of C1822A and returns to the PCM on pin 59 of C175B
So that's 2 pins between PCM and TCM (C175B/C1822A)
2 pins between TCM and DCDC (C1457A/C1822G)
and 3 jumpers on the top of other cables (C1822B/C1822C/C1822E)

Since the signal originates and returns to the PCM, it's responsible for monitoring that circuit. Pretty sure the jumpers are the top wires on the three plugs along the side and I believe the connector cut off just below them is the one to the DCDC.

35ed7bf263d9b2c19ccbc57b6f88dafc.jpg


This is under the foam topper and under a wrap. You might be able to get to them without taking it off but I gave up and cut mine out completely. It's the dusty/furry thing on the bottom right.

C175B is the BIG connector coming from the junction box with fuses.
C1457A is the big cable at the bottom going into the DCDC
C1822A is a 2x8 (16) pin low voltage connector on the TCM (not orange)
C1822B is the large connector on the right bringing the battery bus into the TCM - the interlock pins are internal to it, so probably mess with that only if none of the others fix it.
C1822C is a two pin cable that carries the HVIL out of the TCM to the AC compressor module (ACCM)
C1822E is a two pin cable that carries the HVIL out of the TCM to the heater (PTC)
C1822G is a two pin cable that carries the HVIL out of the TCM to the DC/DC converter (DCDC)

You'll have to trace from there. Could be as simple as one of those fine wires getting broken. Be careful removing them so you don't break the connectors. Any of those ones with separate plugs over them should not need the orange plugs removed at all.
 
Not sure if it's a part of - or just connected to - the junction box mounted over the wheel well. But that is where it's located. Someone else had to troubleshoot/triage theirs previously.
 
A P0A0A can also be at the batteries. There are 4 locations and 9 connectors with the interlock pins. If any kind of work was done on the battery at any time, then checking the connectors is a must. 2 of the connectors are these lever type lock-down connectors that are brittle. So don't disengage them if you don't have to. Sometimes a loose connector can last years before the interlock is broken.

If you have a 2016, then it would be worth to check if it is still under warranty. The warranty definitely starts when you buy it, but if it sits on the lot for a long time, like mine, the warranty can start earlier. But worth the effort to check. But also worth it to check your connectors.

Location 1: Check the high voltage battery service disconnect at the passenger rear wheel. It should be in there solid. I'd just grab the top and shake it and see if it is loose. Generally, if it isn't properly engaged, it will come off without too much effort.

Location 2: Behind the rear seat. Remove the square panel just to the right of center. Here you will find the same battery service disconnect as location 1. Do the same thing to check if it is secure. There are 3 more connectors in the interlock chain to the right of the service disconnect. They are behind the black plastic. If you have never had the battery serviced, then these would be unlikely and I'd check the other locations before coming back to this one. But you would need to remove the large black plastic; or at least pull it forward at the top so you can check the connectors. The first of the 3 is immediately to the right of the service disconnect. It is just a cover, but it has interlock pins and is in the loop. There is square connector with a bolt in the middle, but that one doesn't have the interlock connector, but the other 2 do. Those 2 have a 3 step process to get them removed, so just check that they are secure and don't wiggle.

Location 3: There are 3 just behind the rear driver's side wheel. There are 2 connectors just like the 2 rightmost connectors behind the rear seat. Check those in the same way. Below those is the lever style connector that was the root-cause on my P0A0A issue. The dealer had broken this connector and was loose. It should be firmly attached and not rock forward to backward. Refrain from disconnecting if you can. The plastics can be brittle and break. If you do feel the need to disconnect, there is a little blue tab that holds the locking lever down. Disengage that and then lift the lever up. Make sure both sides of the lever move evenly and perhaps apply force lower down on the lever as opposed to the top of it to prevent it from breaking. When I re-attached mine, I put just a little bit of grease on the sliding surfaces and it make it a whole lot easier to move.

Location 4 is under the car. Just in front of the lower battery and in the center. There are 2 connectors here. One square one with a bolt in the middle; just like the one behind the rear seat. This too, is not in the interconnect loop. The lower connector is just like the one at Location 3 with the lever. Check it in the same manner.

All these connectors will have 2 little pins on them or on the interfacing mounted connector. They should all be covered in dielectric grease and not bent. The grease is to prevent corrosion and connectivity from being lost. For my 2012 Focus, the application of the dielectric grease was a TSB that got implemented back in 2013 or 2014. A 2016 should already have it. Also, for the Interlock connectors on the battery, all the wires that form the interlock loop are in the battery, so the only focus is on if the connectors are loose or the shunting pins are bent or corroded.

As for the front, I have no experience there. Probably the same principles apply, but Anti-Climax has a pretty good outline above.
 
While you can have the same error on any of the HVIL circuits, this error is posting from the PCM, which only runs the loop outlined above.

I would STRONGLY suggest not touching the connectors on the other loops if they are not errored, lest that create more problems. With the exception of pulling the battery disconnects if any of the HVDC plugs is getting pulled up front.
 
Update:
We sent the car to the dealer, since I was working under the assumption this would be covered under the 8 year warranty.
Dealer told us the high voltage cable to the AC compressor need to be replaced, and it would not be covered under the warranty.
After going around and around with the dealer and Ford about this being a unique component to the electric drive system, the dealer told us they were not covering it because of rodent damage. Dealer suggested to go through our insurance, which is what we are doing, with $1000 deductible. From the picture, I would have just fixed it myself if I had known where the problem was and how to get to it.
So how do we keep the rodents from doing more damage?
 

Attachments

  • thumbnail_20240228_130733 (1).jpg
    thumbnail_20240228_130733 (1).jpg
    736.1 KB · Views: 4
  • thumbnail_20240228_130726 (1).jpg
    thumbnail_20240228_130726 (1).jpg
    726.4 KB · Views: 4
So the rodents know how to use a soldering iron?

When I lived on a horse ranch rodents were everywhere. I put mouse traps on the ground, on the inside side of the tires.

This will take out the ones that get into your garage, but you gotta do things to prevent them from getting into your garage. Weatherstripping, expanding foam, stuff like that. Let your (or your neighbor's) cat or dog spend some time in the garage. Their smell will scare off the mice.

Not to be a jerk, but I do not believe any car manufacturers cover rodent damage as a warrantable issue. And car manufacturers are sticklers, If the HV cable was for something other than the battery or drive unit (AC compressor) they are not going to just lump it under the HV battery warranty.

If that solder joint is solving your problem, and it did not cost you any more than $50 to have fixed, consider yourself lucky. They really should have done a more comprehensive repair than just globing some solder onto a wire.
 
Back
Top